
Table of Contents
- Exploring the Versatility of Watercolors in Artistic Expression
- Techniques to Master: From Wet-on-Wet to Dry Brush
- Choosing the Right Materials for Your Watercolor Journey
- Tips for Enhancing Your Watercolor Artwork with Layers and Texture
- Q&A
- In Summary
Exploring the Versatility of Watercolors in Artistic Expression
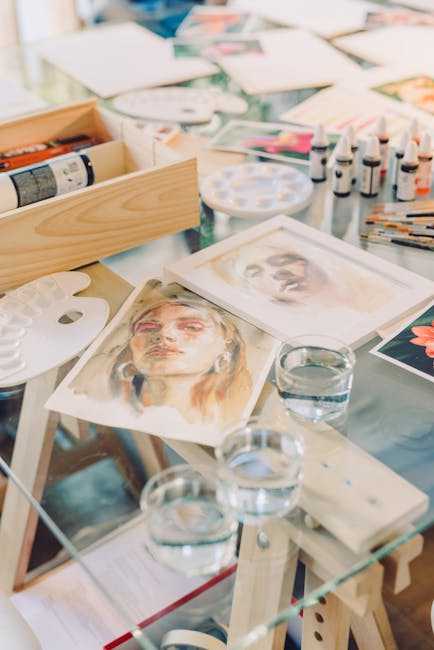
Watercolors offer artists a remarkable medium that blurs the lines between precision and spontaneity, allowing for a dynamic expression of creativity. Their fluidity and transparency invite an exploratory approach, where brush strokes can yield unexpected outcomes. One of the defining features of watercolors is their ability to create a diverse range of effects, from soft washes to vibrant, bold statements. Artists can utilize techniques such as wet-on-wet, dry brush, or glazing to manipulate the paint’s behavior, resulting in unique textures and depths that are difficult to achieve with other mediums.
Experimentation is at the heart of watercolor artistry, making it a favorite among both beginners and seasoned professionals. The medium encourages exploration through a low barrier of entry, as watercolors can be diluted and blended easily. Here are a few common techniques that showcase the versatility of this medium:
- Wet-on-Wet: Applying wet paint onto a wet surface to create soft edges and fluid blends.
- Dry Brush: Using a brush with minimal water for sharp lines and textures, perfect for detail work.
- Layering: Building washes on top of one another to create depth and contrast.
- Salt Technique: Sprinkling salt onto wet paint to produce texture and unique patterns.
In addition to these techniques, the choice of paper and tools can dramatically influence the final artwork. High-quality watercolor paper can enhance the paint’s vibrancy and support a variety of techniques without warping or bleeding. Artists often explore different brush shapes and sizes, each offering a distinctive way to apply and manipulate the paint. Here’s a simple table to illustrate common tools used in watercolor painting and their effects:
| Tool | Effect |
|---|---|
| Round Brush | Ideal for detail and line work |
| Flat Brush | Great for washes and broad strokes |
| Fan Brush | Creates texture and natural elements |
| Sponge | Good for adding texture and soaking up excess water |
Artists have also begun to combine watercolors with other mediums, such as ink and pastels, to create mixed-media pieces that expand the boundaries of traditional watercolor art. This fusion allows for innovative expressions and dimensions, making artworks not only visually appealing but thematically rich. The versatility of watercolors lies not just in their application but also in their capacity to adapt to the artist’s vision, making them a powerful tool for storytelling on canvas.

Techniques to Master: From Wet-on-Wet to Dry Brush
Watercolor painting is a versatile medium that allows artists to explore a variety of techniques, each adding depth and character to their work. Among these techniques, the wet-on-wet method stands out for its fluidity and spontaneity. This approach involves applying wet paint onto a wet surface, allowing colors to blend and bloom organically. It’s perfect for creating soft backgrounds or ethereal landscapes. To master this technique, practice by using a large brush to apply clear water onto your paper before adding pigment. Watch how the colors swirl and merge, creating unique patterns that are often unpredictable but full of charm.
In contrast to the lushness of wet-on-wet, the dry brush technique offers a sharper, more defined approach. Here, a brush that is relatively dry—meaning it contains less water—is used to apply pigment onto the paper. This method is fantastic for adding texture, fine details, or enhancing shadows in your artwork. Experiment with varying pressure on the brush to achieve different effects. For example, light pressure creates gentle strokes, whereas pressing harder yields bold lines. Both wet-on-wet and dry brush techniques can be combined to create striking contrasts within a single piece.
To deepen your understanding, consider creating a small practice chart where you can document the results of different applications of these techniques. Here’s a simple table that outlines the characteristics of each method:
| Technique | Characteristics | Best Used For |
|---|---|---|
| Wet-on-Wet | Soft, blended colors; unpredictable outcomes | Backgrounds, skies, and ethereal effects |
| Dry Brush | Sharp, textured strokes; defined edges | Details, textures, and highlights |
Integrating these techniques into your watercolor practice can elevate your artwork significantly. Don’t hesitate to mix and layer; apply a layer of wet-on-wet for the background and then use the dry brush for foreground details. This combination can provide a stunning visual contrast, adding complexity to the composition. Continually experimenting with these methods will not only expand your skill set but also help you discover your unique artistic voice within the realm of watercolor painting.
Choosing the Right Materials for Your Watercolor Journey
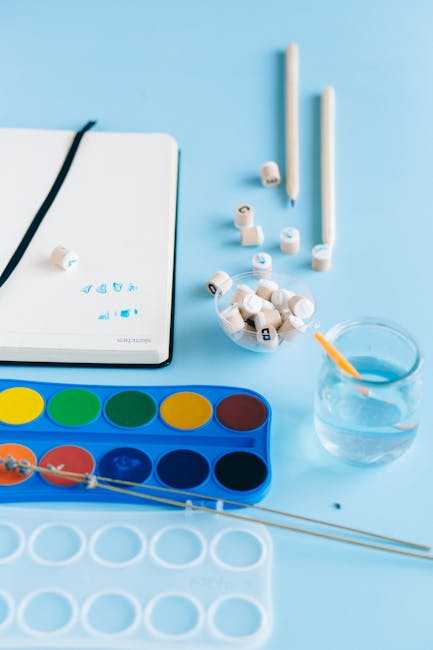
Embarking on your watercolor journey necessitates a thoughtful selection of materials that can profoundly influence your artistic experience. Choosing the right paper is critical, as its texture and weight can significantly affect how the paint interacts with the surface. Opting for 100% cotton paper provides excellent absorbency and durability, making it a favorite among professional artists. Conversely, if you’re exploring options for practice or experimentation, consider using student-grade papers, which are more economical while still offering decent performance.
Beyond paper, the choice of brushes plays a crucial role in executing your vision. High-quality brushes made from sable or synthetic fibers can facilitate a variety of strokes and techniques. When selecting brushes, look for a range of sizes to accommodate different aspects of your work, from fine details to broad washes. Additionally, having a round, flat, and filbert brush on hand will expand your creative toolkit, allowing for versatility in your painting style.
Equally important is the selection of watercolor paints themselves. Understanding the difference between tube versus pan paints can guide your decision. Tube paints often boast more vibrant pigmentation and are ideal for larger works, while pan paints are portable and perfect for plein air painting. When possible, invest in quality paints from reputable brands, as the richness of color and transparency will elevate your artwork. Keeping a palette that includes both primary colors and secondary shades can also enhance your ability to mix and create a wider range of hues.
| Material Type | Best Use | Note |
|---|---|---|
| Paper | Detailed and vibrant works | Use 100% cotton for best results |
| Brushes | Varied techniques | Include round, flat, and filbert brushes |
| Paints | Bright colors and mixing | Choose tube for vibrancy, pan for portability |
consider your accessories, such as palettes, masking fluid, and water containers. A sturdy palette is essential for mixing colors efficiently, and a container with a lid can keep your brushes clean and organized during transport. Using masking fluid can help preserve certain areas of your paper, allowing for more vibrant overlays and layered effects. By thoughtfully curating your watercolor materials, you create a foundation for inspiring artwork that reflects your unique artistic journey.
Tips for Enhancing Your Watercolor Artwork with Layers and Texture
One of the most effective ways to bring your watercolor artwork to life is by utilizing layers. Begin with a foundational layer, applying a light wash to establish the base color of your piece. This base not only acts as your background but also sets the tone for subsequent layers. As you build upon this foundation, make sure to allow each layer to dry completely before adding the next. This technique prevents colors from bleeding and creates depth, giving your painting a more vibrant look.
Incorporating texture into your watercolor paintings can significantly enhance their visual appeal. Experiment with various tools and materials to create different textures. Consider using salt, sponges, or even plastic wrap to achieve unique effects. These methods can add unexpected elements, such as granulation or soft blends, that can capture the viewer’s eye. Try layering these textured applications over dried washes to create a more dynamic composition.
Don’t shy away from using contrast with dark and light colors, as this can greatly amplify the depth of your artwork. Darker shades can be strategically placed in the foreground or areas of interest to draw the viewer’s eye, while lighter tones can serve to highlight and give the illusion of light and space. Remember, the balance between contrast and harmony is crucial, so reflect on how each color interacts within the overall scheme.
Lastly, consider the potential of translucency in your layers. Watercolors are inherently transparent, allowing previous layers to shine through. Use this characteristic to create glazing effects where lighter layers are applied over darker ones. This not only enhances depth but infuses a luminous quality into your artwork. For a practical approach, you can create a simple table illustrating the layering process:
| Layer | Color Type | Texture Technique |
|---|---|---|
| Base Layer | Light Wash | Flat Brush |
| Mid-tone Layer | Vibrant Color | Sponging |
| Detail Layer | Dark Color | Dry Brushing |
| Final Glaze | Translucent Wash | Thin Brush |
Q&A
Q&A on Art Watercolors
Q: What are watercolors, and what makes them unique compared to other painting mediums? A: Watercolors are a type of paint made from pigment suspended in a water-based solution. Their uniqueness lies in their transparency and fluidity, allowing artists to create soft washes, delicate layers, and vibrant hues that can blend seamlessly. Unlike oil or acrylic paints, watercolors require water to activate, giving them a distinct luminosity. Q: What are the essential supplies needed for watercolor painting? A: To get started with watercolor painting, you’ll need a few key supplies: quality watercolor paper (preferably cold-pressed for texture), a set of watercolors (tube or pan), a variety of brushes (soft and stiff bristles), a palette for mixing, and clean water. A paper towel or cloth can also come in handy for blotting or drying brushes. Q: How do I choose the right watercolor shades for my artwork? A: Choosing the right watercolor shades depends on your desired outcome and personal style. Beginners might start with a basic set that includes primary colors, allowing for a wide range of mixing options. As you progress, consider adding specific hues that resonate with your artistic vision, such as earth tones or vibrant florals. Q: What techniques can beginners use to improve their watercolor skills? A: Beginners can practice several fundamental techniques, including wet-on-wet (applying wet paint on wet paper), wet-on-dry (applying wet paint on dry paper), and dry brushing (using minimal water for texture). Experimenting with different brush strokes, layering washes, and practicing color blending can also enhance skills over time. Q: How can I avoid common mistakes when painting with watercolors? A: Common mistakes include using too much water, which can lead to muddiness, or not allowing layers to dry before adding new ones, resulting in unintended mixing. To avoid these pitfalls, maintain a balanced water-to-paint ratio, and patiently wait for each layer to dry. Additionally, practice planning your compositions beforehand to minimize unwanted surprises. Q: Can watercolor paintings be framed and displayed like other artwork? A: Absolutely! Watercolor paintings can be framed and displayed beautifully. It’s advisable to use acid-free mats and glass to protect the artwork from fading and moisture. Also, consider using a backing board to prevent warping. Properly framed, watercolors can add a soft and elegant touch to any space. Q: Are there specific themes or subjects that work best for watercolor painting? A: Watercolors are incredibly versatile and can be used to depict a wide array of subjects. Popular themes include landscapes, florals, abstracts, and portraits. The medium is particularly effective for capturing the nuances of light and color, making it ideal for natural scenes and delicate subjects. Q: How can I find inspiration for my watercolor projects? A: Inspiration can be found in numerous places, from nature and everyday life to art galleries and online platforms like Pinterest or Instagram. Joining local art groups or classes can also spark creativity through collaboration and feedback. Sometimes, simply setting aside time to explore and paint whatever catches your eye can lead to surprising new ideas. Q: What advice do you have for someone wanting to develop their own style in watercolor painting? A: Developing a personal style takes time and experimentation. Start by studying the work of artists you admire, but don’t be afraid to diverge from those techniques. Keep a sketchbook to experiment freely without pressure, and allow your experiences and preferences to guide your artistic journey. Over time, your unique voice will emerge naturally. By addressing these common questions, aspiring watercolor artists can begin their journey equipped with the knowledge and inspiration needed to explore this beautiful medium.In Summary