
Table of Contents
- Exploring the Beauty of Watercolor Flower Techniques
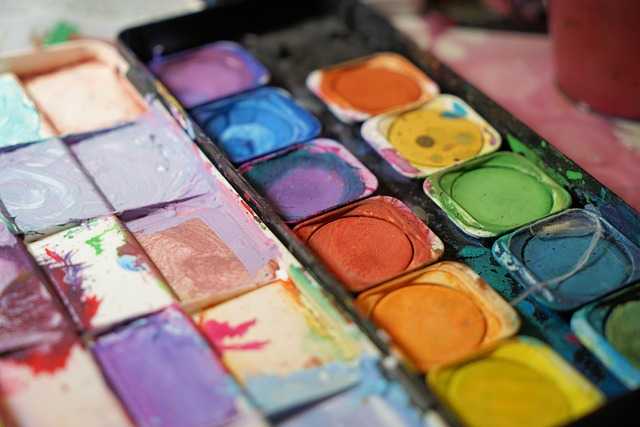
- Choosing the Right Supplies for Stunning Floral Artwork
- Step-by-Step Guide to Creating Lush Flower Landscapes
- Tips for Adding Depth and Dimension to Watercolor Florals
- Q&A
- Final Thoughts
Exploring the Beauty of Watercolor Flower Techniques
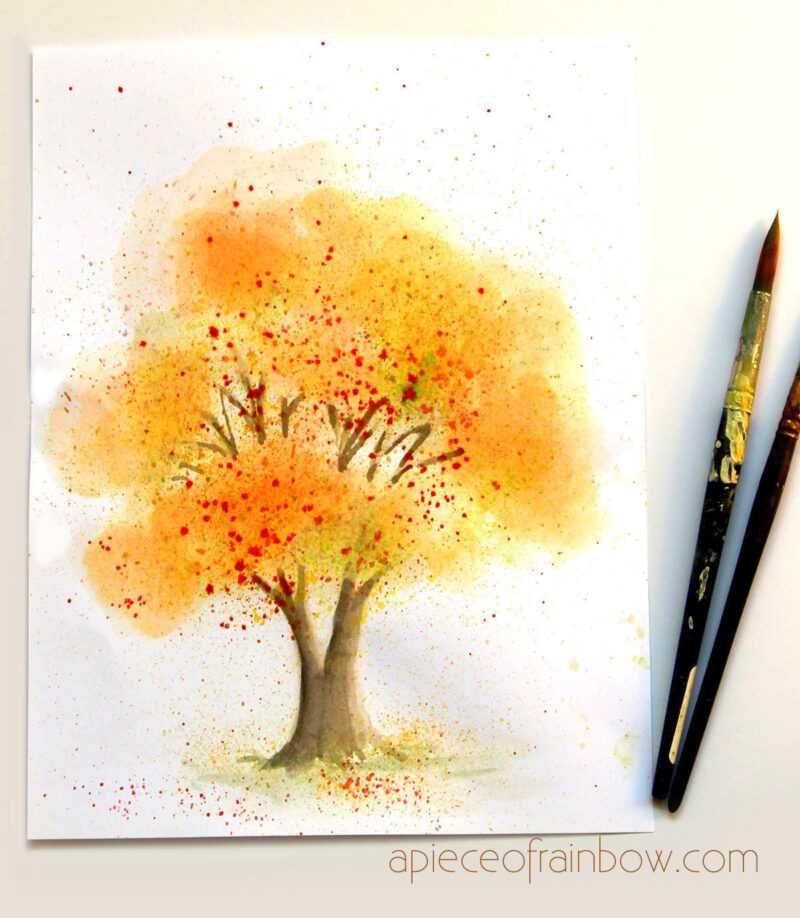
Watercolor flower painting is a delightful exploration of color and form, allowing artists to capture the delicate beauty of nature. One of the most compelling techniques in this medium is the use of wet-on-wet, where paint is applied to wet paper. This method creates soft, diffused edges and allows colors to merge beautifully, reminiscent of blooming petals. Experimenting with various water levels can yield exciting results. For instance, a heavier saturation produces vibrant blooms, while lighter washes hint at the gentle nuances of flower petals.
Another effective approach is the glazing technique, which involves layering transparent washes of color. This method adds depth and dimension to the artwork, enabling artists to achieve a richer and more complex color palette. Start with a light base layer and gradually add more intense hues, allowing each layer to dry completely before applying the next. This slow build-up can transform simple floral sketches into stunning masterpieces, where the interplay of light and shadow creates a sense of realism. Here’s a quick overview of key steps:
- Begin with a light wash: Use diluted colors to lay the groundwork.
- Layer your tints: Gradually introduce deeper shades for depth.
- Seal with a final layer: Ensure the last wash is the most vibrant.
incorporating elements like salt or scrubbing techniques can add unique textures and effects to your watercolor flowers. Salt, when sprinkled on wet paint, crystallizes as it dries, producing a stunning starburst effect that mimics the intricate details in flower centers. Similarly, using a sponge or a toothbrush for splattering can create interesting backgrounds or accents that complement your floral subjects. Experimenting with these embellishing techniques adds a personal touch to your artwork, elevating it beyond traditional representations. Below is a comparison table of these various techniques:
| Technique | Description | Best For |
|---|---|---|
| Wet-on-Wet | Painting on wet paper for soft edges | Gradual color blends |
| Glazing | Layering thin washes for depth | Rich, complex colors |
| Salt Technique | Adding salt to wet paint for texture | Creating unique effects |
| Splattering | Splashing paint for accentuations | Dramatic backgrounds |
Choosing the Right Supplies for Stunning Floral Artwork
When embarking on your floral watercolor journey, selecting the right supplies is essential to translate your vision onto paper. Start with quality watercolor paints; look for brands with high pigmentation and lightfastness. These attributes ensure that your colors remain vibrant over time. Some excellent options include:
- Winsor & Newton Cotman: Affordable yet high-quality student-grade paints.
- Daniel Smith Extra Fine: Renowned for their vivid pigments and smooth application.
- Sennelier L’Aquarelle: Professional-grade paints made from pure honey, giving them a unique texture.
The choice of paper plays a pivotal role in the final appearance of your artwork. Watercolor paper comes in various weights and textures, with the following three types being the most popular among artists:
| Type | Weight (gsm) | Texture |
|---|---|---|
| Cold Press | 200 – 800 | Rough surface; ideal for washes and texture. |
| Hot Press | 200 – 800 | Smooth surface; perfect for fine details. |
| Rough | 300 – 800 | Highly textured surface; excellent for dramatic effects. |
Brush selection is another critical aspect that can greatly affect your painting technique. Different brushes offer varied shapes, sizes, and bristle types, allowing you to achieve diverse strokes and effects. Here are essential brushes to consider:
- Round Brushes: Versatile for detail work and covering larger areas.
- Flat Brushes: Great for creating sharp edges and filling in large spaces.
- Mop Brushes: Ideal for applying washes and creating soft, blended backgrounds.
Lastly, don’t overlook the importance of additional tools and supplies that can enhance your floral artwork process. Items such as masking tape, palettes, and sponges also contribute to a successful painting experience. Collectively, these supplies work harmoniously, enabling you to unlock your creativity and craft breathtaking floral compositions in watercolor.

Step-by-Step Guide to Creating Lush Flower Landscapes
Creating a stunning flower landscape starts with a thoughtful selection of blooms. Begin by choosing native plants that thrive in your climate, as they require less maintenance and contribute to the ecosystem. Consider adding a variety of species to create depth and texture. Some popular choices for vibrant landscapes include:
- Lavender: Adds a fragrant touch and attracts pollinators.
- Sunflowers: Bright, bold, and perfect for sunny spots.
- Roses: Classic beauty with numerous varieties.
- Bee Balm: A favorite among bees and butterflies.
Once you have selected your flowers, planning the layout is essential. Visualize your design in layers, placing taller plants in the back and shorter ones at the front to create an inviting view from all angles. A draft plan could help; consider using graph paper or garden design software. In your layout, remember to leave space for each plant’s growth, ensuring they have enough room to flourish without overcrowding:
| Plant | Height (Feet) | Spacing (Inches) |
|---|---|---|
| Lavender | 2-3 | 18 |
| Sunflowers | 5-12 | 24 |
| Roses | 2-6 | 24 |
| Bee Balm | 2-4 | 18 |
After planting, maintaining your flower landscape is key to achieving that lush, watercolor-like effect. Regular watering, mulching, and pruning will keep plants healthy and vibrant. Take note of any disease or pest issues, and consider using organic methods to keep your garden flourishing. Additionally, seasonal changes can affect your colors; ensure your garden is alive year-round by incorporating bulbs and perennial plants that bloom at different times, thereby keeping the aesthetic fresh and dynamic.
Tips for Adding Depth and Dimension to Watercolor Florals
When it comes to elevating your watercolor florals, incorporating various techniques can create stunning depth and dimension. One approach is to use layering, where you build up colors gradually. Start with a light wash as your base, and then add darker shades to the petals and leaves. This method can produce a sense of volume, making the flowers appear more lifelike. Remember to let each layer dry before adding more to avoid muddy colors and to maintain clarity in your work.
Another effective technique for adding dimension is to experiment with wet-on-wet and wet-on-dry applications. In wet-on-wet, apply wet paint onto a wet surface, allowing colors to blend naturally and create soft edges. This is perfect for softer flower forms, such as peonies and daisies. Conversely, wet-on-dry involves applying wet paint onto a dry surface, resulting in sharper edges and more defined shapes that are great for tulips or roses. Understanding these techniques allows you to decide how bold or soft you want your flowers to appear.
Incorporating contrast in your color palette is vital for achieving depth. Use complementary colors together to make the flowers pop against the background. For instance, warm yellows and oranges paired with cool purples and blues can illuminate your floral artwork. A smart use of darker tones in the shadow areas of the petals and lighter hues on areas exposed to light helps enhance the three-dimensional feel. Always keep a sense of harmony while balancing these contrasts to maintain a cohesive look across your painting.
Lastly, don’t overlook the importance of negative space in your composition. Allowing areas of white space around your flowers can emphasize their beauty and give the impression of depth. Consider arranging your florals in a way that some parts overlap or extend beyond the edge of the canvas, creating a sense of movement. Additionally, using varying line weights in your outlines or adding fine details can further enhance the overall aesthetic while adding another layer of complexity to your work.
Q&A
Q&A: Watercolor Paintings of Flowers
Q1: What makes watercolor a popular medium for painting flowers? A1: Watercolor paint offers a unique ability to capture the delicate beauty and translucence of flowers. Its fluid nature allows for soft blending and layering, creating an ethereal quality that mimics the organic textures and colors found in nature. The unpredictability of watercolors can also lead to delightful surprises, enhancing the charm of floral subjects. Q2: What are some tips for beginners interested in watercolor flower painting? A2: Start with a few basic supplies: quality watercolor paper, a good set of paints, and a variety of brushes. Begin with simpler flower shapes, such as daisies or poppies, to build your skills. Experiment with wet-on-wet techniques for soft edges and wet-on-dry for sharper details. don’t forget to practice patience; layering colors slowly can produce stunning depth. Q3: How do artists choose which flowers to paint in watercolors? A3: Artists often select flowers based on personal significance, seasonal availability, or striking visual appeal. Some may prefer popular blooms like roses and tulips, while others might be drawn to unique wildflowers. Observing flowers in their natural environment or using photographs can provide inspiration, allowing artists to capture the essence of their chosen flora. Q4: Are there specific techniques to enhance the beauty of floral watercolors? A4: Yes, various techniques can elevate floral watercolors. Glazing, which involves layering transparent colors, can add depth. Using salt can create interesting textures and patterns, while lifting techniques allow you to remove paint to highlight areas. Incorporating elements like splattering can also mimic the effect of dew or splashes of sunlight on petals. Q5: Can watercolor flower paintings be used decoratively? If so, how? A5: Absolutely! Watercolor flower paintings can serve as stunning decorative pieces. They can be framed and hung as focal points in a room, used to enhance a gallery wall, or incorporated into home decor items such as cushions and tablecloths. The soft colors and gentle forms of watercolor florals often complement various interior styles, adding warmth and charm. Q6: Where can I find inspiration for my own watercolor flower paintings? A6: Inspiration can be found everywhere! Nature walks, botanical gardens, or even your backyard can provide a rich source of flora to observe. Additionally, online platforms like Pinterest, Instagram, and art blogs are great for discovering different styles and techniques. Art books focusing on floral painting can also spark new ideas and encourage experimentation.Final Thoughts